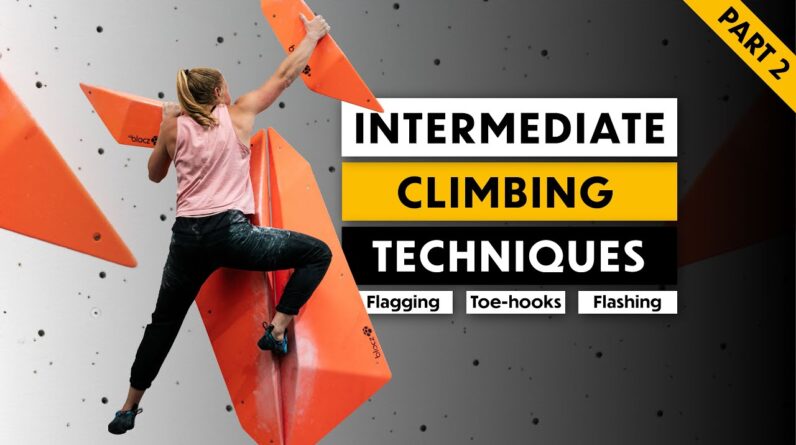
We are back for part two of one of our most popular videos ever! In this episode Josh and Jen revisit the topic of intermediate climbing techniques. Here we discuss the why’s, when’s and how’s of flagging and toe hooking techniques. Both essential climbing techniques to master if trying to progress your climbing performance. This compliments our previous video () where we discussed twisting and heel hooking. We also run though the tactic we use when trying to flash hard boulders. Flashing boulders is a skill all climbers should practise because it helps hone your skills for recognizing movement options, building commitment and adapting intuitively to new movement options. We cover things like route reading, visualisation and being able to adapt your plan.
One of our most popular youtube videos Was our intermediate climbing techniques Where me and jen run through a bunch of Techniques which are essential for those Intermediate climbing grades so we’re Back again today at the depot sheffield To film part two of our intermediate Climbing techniques Today we’re going to be covering Flagging tow hooking and the tactics Required for flashing hard boulders [Music] Flagging is going to be one of the most Common techniques used by climbers to Find balance on the wall by changing Their body position the reason we need To find balance on the wall is to make The moves often more controlled and this Can make the moves much less strenuous On the body the principle of flagging is Essentially moving your leg or your foot Out to the side of your body this is Going to shift some of your weight or Your center of mass over to one side Making it easier to make the move either In that direction or away from that Direction jen is going to show us the Three common types of flagging that We’re going to use while on the wall so This first one is going to be called an Outside flag so the leg is coming away From the body again we just got one foot On the wall and this is helping find Balance so jen can take her hand off the
Wall to make a move this is what we call An inside flag so her leg is coming on The inside of her body and pressing into The wall this is helping her balance Seeing she can rest off the wall just on One hand She’s going to flick this Into A back flag So this is very similar position and This is what we call a back flag because The leg is going behind her now that We’ve shown you the three main types of Lagging we’re gonna put them into Practice and show you how you can use Them on the wall [Music] So [Music] This is a bold problem with an example Of where flagging is really useful and At least for my ability it’s almost Essential that i flag underneath to come Into this match And that’s because i need as much weight Over here in this direction and on this Foothold as possible Because the hand hold is kind of not Great facing in the wrong direction And if i leave my body weight over here What happens is i come into match And i have nothing pulling me back Anymore and suddenly i start swinging This way and this is kind of what we
Call a barn door where you’re unbalanced And your hinges are all wrong and you’re Just going to swing away from the wall And if i don’t get my weight in this Direction i’m just going to peel off This handhold okay and this is i’m going To try and flag My leg which isn’t on the foothold so my Right leg as far under as possible To get my weight over there before i’ve Even come in into the match [Music] So this is a perfect example of a back Flag i’m taking my back leg And dropping it behind And i’m also what i actually ended up Doing when i flick into this one I ended up putting the flag in again Because i wanted my weight over here so That i wasn’t swinging into this as Aggressively get my weight there first And then come in much slower so on the Purple climb that style of flagging was Very much just about finding balance Using body position so when i was making The move my center of gravity was moving Over However on this red climb we’re going to Use a different style of flagging which Is much more about using body tension And pushing into the wall with your Flagging leg to make the movement one Observation you can make when looking at A climb
Is if there are a lot of footholds and Not many footholds with this red one Straight away i can see there’s probably Only one foothold to start and then not That many through the rest of the climb And this already makes us start to think That there’s probably going to be a lot Of flagging movements on this climb Because you don’t have many footholds Available [Music] This style of flagging where you have to Place your foot against the wall Requires core tension you’re actually Actively pushing on that foot so core Strength exercises are also going to Help your ability to form these Tension-based flagging moves so we’re in A gym today which is actually really Good at setting foot holds exactly where You need them and this is nice for root Setting and it helps direct your Technique however in this case we want To learn how to flag where footholds Aren’t always available so one drill We’re going to use right now is a drill Where you’re only allowed to place one Foot on a foothold at any one time You’re not allowed two footholds to make A move So you’ll see jen’s just placing that One foot on the wall she’s of course got More for holds available and then as she Goes through
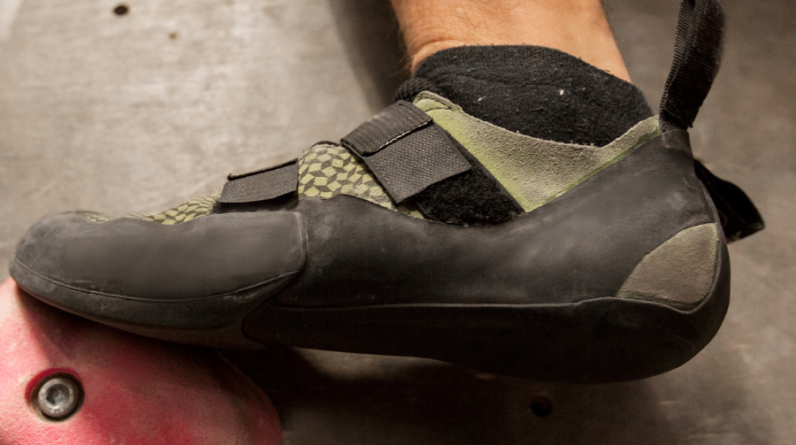
Try to alternate between which foot You’re moving off so you’re not just Going left right try and use the same Foot yeah so going for an inside flag There back flag on that one And it’s gonna Keep it quite varied and interesting Moving between different footholds each Time the nice thing about this drill is You’re gonna perform it on all sorts of Different boulder problems so the same Flagging position is never gonna occur Twice giving you that really big variety Of movement which is essential for Mastering the skill [Music] In part one of our intermediate climbing Techniques we covered heel hooks and now We’re covering the other side of the Shoe we’re talking about toe hooks toe Hooks are essentially going to do the Same thing that a heel hook will for you But they can be much more useful in Several situations the first is it’s Going to give you a bit more reach in Gaining that hold they can also be Really helpful for body positioning when Placing a toe hook you can often sink Your hips slightly further away from the Foothold which can give you more balance In the same way that flagging can you May also find in certain situations Where you’re unable to get a heel hook Because of the orientation of a hold
That a toe hook works better instead and Finally sometimes releasing a heel can Result in a big swing because it keeps You really locked in whereas releasing a Toe hook can be much easier and result In less of a swing this purple boulder Problem starts with a really obvious toe Hook position and this is the hold we’re Going to toe hook on this brings us to Our first point which is really Important when we’re talking about the Technique of toe hooking and that is the Placement or orientation of the foot on The foothold so here we’re looking at if We’re going to place it toe into the Wall Or heel down essentially what we’re Trying to do is get as much of our foot Behind that foot hold as possible so Looking at this orientation this big fin I’m going to keep heel down and this is Going to give me the best purchase on That foothold the next thing we’re Looking at is hip positioning and jen is Going to demonstrate how we position our Hips when using a toe hook so the most Important thing we’re looking at here This jenna’s going to straighten her leg And this is going to sink the hips away From the toe hook this is going to Weight it more using less strength to Hold that position so jin’s going to Also demonstrate using a bent leg what You’ll find is this is a more strenuous
Position It probably falls out anyways meaning it Makes the move a lot snatchier having to Grab that in that decelerating position This boulder is a perfect example of Where a tow hook is going to work much Better than the hill for jen she Couldn’t get the heel hook on because it Was too far away and also the Orientation would be awkward to get that Kind of rotation this yellow boulder is A great example of needing to use a tow Hook to make the first move so if we run Through the steps needed to perform this Tow hook move first we’re talking about The orientation of the foot to get that Purchase on the foothold so if we look At the shape of it it’s clearly going to Work best in this position here with the Heel pointing down and not rotate it out To the side The next thing we’re going to look at Which jenna’s going to demonstrate is She’s going to shift her hips away from The toe hook bringing the hips out Straightening the leg by straightening That leg she’s going to bring her hips Over underneath the hole she’s going to Finding that balance point before Actually releasing the hand [Music] In the last part me and jen covered Projecting but today we are going to Cover flashing now this is less of a
Technique and it is more of a tactic so Me and jen are going to go through the Best tactics we use when we’re trying to Approach a boulder and climb it first go So we’re going to start on this red one On the comp wall because they tend to be Really committing and designed to be Hard to flash right we’re gonna start With a good route read and find all the Holds Yeah that’s quite easy on this one They’re quite big yeah Apart from this one it’s the only small One on it yeah And then you come up with a A sequence that you think will work I reckon it’s a big big jump to this First hold yeah Which has like a dip at the back so if You like get further away you can often See the profile of the hold a bit better Yeah And then what do you think left hand up Or right hand I think foot down there yeah Okay this match yeah then i think the Twist will be a quite hard match then Foot on this thing Then maybe left into the shoulder left And shoulder foot output match and go Yeah so you can see me and josh are sort Of mimicking the moves with our hands And this is just a form of visualization Really
And kind of practicing the moves off the Wall so we have a basic sequence in mind But it’s also really important to Remember that you might need to adapt When you’re on the wall so we’ve got a Plan a but if we need to tweak anything Then we can we can do that flashing if You can brush the holds if it means a Lot to you make sure you’ve got Everything in your favor and friction is A big one of those yeah and then the the Last point is To just fully commit like believe you Can flash it don’t have one of those Tescos where you just half try [Music] Yay But also another tip is if you’re Climbing with someone that has different Strengths or weaknesses to you or Different heights different arm span Then like don’t get sucked into copying Exactly what they just did and think About where it might differ for you if It’s a reach or it’s a body positioning Thing come on Nice Oh Slippy i just lost the friction on it Next we’re gonna try this green one and This is a pretty typical competition Block where all of the holds are really Big And we’re gonna have to just figure out
The body positions rather than the Sequence of hand moves [Music] Come on [Music] Come on Yeah Oh that was pretty close Not feel like the right body position Felt like they’re living in that yes So the other thing we can look for is Bits of rubber or like chalk prints To show us where we might hold the holds When they’re this big it’s really good To know Like bits that might be more more useful [Music] Change your plan Come on Come on oh that’s the way you’d hit that Yeah you’d have had that Just sunk out the shoulder of it oh dear Good effort That’s the way then now yeah so i got Into a similar position to josh And it felt totally weird to me i Couldn’t Really get any more height so I just changed my plan like i saw a Little bit of rubber on this hole on the Left So i thought i’d try that and explore Where that got me And
Yeah eventually it started to feel Pretty doable like that i think that’s The method that one yeah So next one we’re gonna do this purple Because I love a slab no i hate slabs But jen said we have to climb this one And they’re always really hard to flash Like a little bit spookier i think it’s I think it’s right foot on yeah Up through Bring left three to this right foot There Up to that after that and then where You’re going to put your left foot for The end just oh it looks like People have wedged it in here Yeah maybe it’s in this slot here yeah [Music] [Applause] [Music] Nice [Music] [Music] Nice little uh Foot jamming technique Yeah i might not do that [Music] Oh Serves generic for making me try a slab This quite bunched up for me i might go To this first Yeah i Wonder if that’s how it’s been set up
And then that [Music] Come on [Music] Come on Oh good work actually has to try quite Hard As you can see from our flashing session We didn’t do all of the boulders and That’s totally normal if you end up Finishing your flashing session and You’ve done every single boulder try Thinking about adding in some harder Boulders into that session to push Yourself more because that’s where You’re really going to learn the lessons And tactics required for flashing hard Boulders so that was our intermediate Session two so if you enjoyed that make Sure you check out session one where we Covered some different tactics and don’t Forget to like and subscribe [Music] You