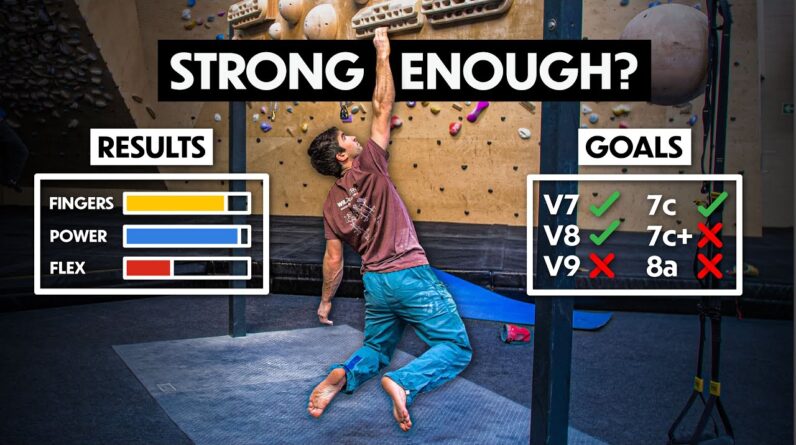
We are really excited for this episode to be the first in our Plan Writing Series! And we kick off with what we think is the starting point of any good training plan – an assessment. We see similarities in this planning process like planning a good journey and forming your roadmap. But before you can decide how to reach your goals (the destination) you must first understand where you are and your starting point. This is done with a well thought-out climbing assessment.
This next video series might just put us Out of business because we are here to Teach you how to write a simple and Effective training plan We’re going to be using all of the tips And tricks we’ve learned over the years Coaching with our own athletes and help You build a simple framework for plan Design and effective training [Music] In this series we’re going to go through What we think is the holy trinity of Plan writing this is going to keep it Really simple but each of these points Is crucial to effective training the First part is building a roadmap and a Timeline of your training we’re then Going to discuss building in progressive Overload into that plan and the final Part is making time for recovery this is Where adaptation happens in this first Episode we’re gonna be talking about What i would call building the road map So this is making a journey of where you Want to go with your training but to Start with we need to know where we First are so our point a if you were Lost in the woods it doesn’t matter Where you want to go until you first Know where you are at least at that Point you can start walking in the right Direction this brings us to the Beginning of episode 1 where we are Talking about assessments this is all
About finding point a the concept of Assessments within climbing is simple we Are going to run a series of tests and See how well performing them or perhaps How are we don’t perform in them this Gives us a nice clear snapshot in time Of our current strokes and weaknesses And most importantly we will use this to Inform our training which is the Building of our roadmap however at this Point some major questions are going to Crop up for example how many tests do we Do what kind of tests are we going to do And how do we know if we performed good Or bad in those tests we’re going to Answer these questions but we are also Going to go through four simple tests Which you can use for your own Assessment because we think these are Quite useful for most climbers so the First question was how many tests should We be using in an assessment here at Last training we might use a large Number of tests particularly with Advanced and elite athletes and this is Because we want to look at a broad Picture but also be able to get into the Nuances and specific details of training I recommend if you’re doing an Assessment for the first time you start Simply with just four or five tests and Go from there this will help you narrow Your training focus which is a really Important part of planning which we will
Cover in later episodes this does not However mean lots of training will go Unmeasured we still have the ability to Measure what we’ll call training metrics As we go along the way and this will be Able to inform pretty much anything you Want to train the next question was Which tests are we going to use if we’re Performing an assessment Now quite simply we should be looking at What we want to achieve in our climbing Maybe that’s a goal maybe it’s a grade Or specific style and then we just want To analyze that and write down a list of Demands which that style or goal needs For example doing an endurance repeater Test on a hang board is not going to be Very specific if your goal is to achieve A really hard four move boulder problem But doing a maximal finger strength test Might be much more useful for this goal Here is a really simple two-step process To deciding what assessments you might Use in your first assessment Number one is ask free or more friends To write down your three biggest Weaknesses but also your three biggest Strengths Come up with the common two of each and Try to devise a way to test them for Example it might come up that you are Particularly weak when it comes to wide Shoulder moves so you might choose to Test pull up strength but specifically
In a wide grip so that you’re keeping The test specific to the weaknesses You’ve addressed in this assessment the Second step is to write down two or Maximum free performance goals and then Try to list the demands of the Performance you can keep it fairly Simple is it maximum strength endurance Flexibility or you can get more detailed Is it particularly wrist strength for Slopers is it core tension try to make It as detailed as you think you can and Then this will help you plan the test as Well you might also want to write down Some process goals because this makes Training really simple i won’t go into The full goal setting process but i’ll Put a link to our goal setting video Over here and also a link in the Description below now from this two-step Process we have an idea of our strengths And our weaknesses but we are also going To have a list of the demands for our Objectives if you have addressed a Particular weakness which will prevent You from achieving the demands of your Goal this will take highest priority in Your training and vice versa if we can Address a strength which is not as much Needed for the demands of your goal you Can put this as a lower priority in your Training you don’t want to only test and Train your weaknesses you also want to Exploit your strengths as much as
Possible even at the elite levels of Climbing climbers still display an Ability to make the most out of their Strengths we often say train your Weaknesses and perform in your strengths So now you’ve identified what you want To test how do you know if you performed Well or bad in these tests well the First way of doing this is to do this Assessment battery with a bunch of Friends climbing at a similar level to You and this will give you an idea of Where you sit in terms of numbers However don’t get too caught up on Ranking strength measures or endurance Measures between a group of friends Because everyone is different and Particularly anthropometrics and Training history is going to mean a big Difference in these schools the other Way is to get a professional to look at The scores and to give you their opinion So sorry but a little plug here i’m Gonna have to mention that currently we Offer remote assessments for just 20 Pounds on our website and this will give You a full detailed and personalized Report which is compared to a large Database and will give you an idea of Your strengths and weaknesses for your Training you don’t need to sign up for a Training plan you can use this to inform Your own training and coaching process Although it helps you don’t necessarily
Need to know if your score is good or Bad you just need to know where you are And how much you want to improve that Score by to achieve your goals the big Thing here is also being realistic with The time frame in which you want to Change these scores and being respectful Of your current training history and how Fast you can make changes to come back To the roadmap analogy you now have your Bearings your current destination and You can start to plan your journey Moving forward if you are still unsure Of what tests you want to do in your Assessment or maybe you’re finding it Hard to set yourself some goals we’re Going to go through four tests you might Add to your assessment which we think Are useful for most climbers the first Test is going to be a finger strength Test and typically we’re going to do This on a fingerboard and we quite like Using a 20mm edge for this which is Roughly one pad deep we’re going to use A seven second max hang protocol this Means we’re gonna hang for a full time And attention of seven seconds but Progressively increasing the load over Roughly eight sets until we reach Absolute maximum we can hold for that Full seven seconds although it’s only a Seven second hang which is relatively Short we’re going to want to rest for Two to three minutes between each hang
So that we are fully recovered and able To try our hardest as you approach your Maximum strength and you feel like You’re reaching failure in these hangs Make sure to keep the increments of Weight nice and small if you have not Used a hangboard before or at all Concerned about using this piece of Equipment a really nice place to start Is testing finger strength on a pickup Edge for example the quad block in this Scenario you’re going to test one hand At a time but you can keep the weight Really nice and light building up very Gradually it doesn’t necessarily matter If you use a slightly larger edge or Slightly smaller edge it’s important to Just keep it consistent between tests so If you’re going to test this again in The future to see how much you have Improved you want to be able to refer Back to your notes and see how exactly You perform this test including the time You hung for how long you took between The rests and any details which might be Different the next test we’re going to Perform is all about the endurance of The forearm so we’re going to use a Repeater protocol here typically we’re Using a seven second hang followed by a Three second rest and this is going to Repeat on a continuous cycle until Failure which means the score we’re Going to get at the end of this is what
We’d call time to failure endurance Tests can be performed at lots of Different intensities we tend to sit Somewhere in the middle around sixty Percent of our maximum seven second hang This can give us an endurance score Which is akin to climbing somewhere Between a 10 or 20 meter route if you Cannot comfortably hang body weight on The edge you plan to test on then this Test isn’t appropriate for you and you Should either use a pickup device for Doing this or you should think about Using a large edge to calculate the 60 Of your maximum you first need to take Into account the total amount you were Holding during your seven second max Hang so this is your body weight plus Any additional weight that gives you the Total load to calculate 60 you’re then Going to multiply that total load by 0.6 As an example i weigh 70 kilos and if in My max 7 second hang i was adding 30 Kilos for my total score my overall load Is 100 kilos if i times that by 0.6 it Means my 60 intensity should be 60 kilos Now obviously that is less than i Currently weigh so i’m gonna have to use A pulley set up to take 10 kilos of Assistance off of my seven free repeater Session our next test is a pulling Strength test and for this we are going To go for maximum strength and a nice Way of doing this is testing a two rep
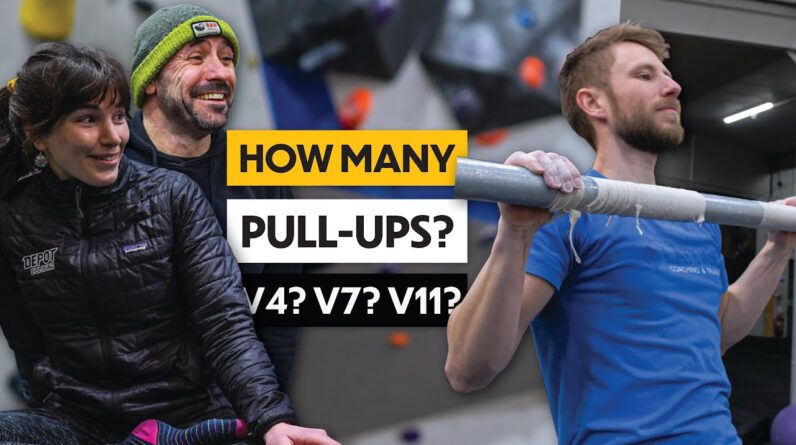
Max so this is the maximum amount of Weight you can pull for two full Repetitions we mentioned the consistency With the fingerboarding and the same is True for the pull-ups particularly here We’re looking at the form you use in the Pull-ups so no kipping and getting the Chin fully above the bar our last test Is a measure of lower body flexibility So this is going to be a side split test Or a box split and here we’re just Looking at the distance we can get Between our feet when performing the Side split skill there’s a few ways to Measure this you might be measuring the Distance between your feet with a Measuring tape and that’s quite handy if You have a friend to measure for you you Could also put something either side of Your feet push those objects apart then Measure that distance you could measure The angle using some free apps available On android and ios or you could use one Of our flexibility mats which should be Out later this year keep your eyes Peeled now we have to find point a on Our road map and we need to start Planning our journey to achieve our Climbing goals and ambitions in the next Episode we are going to talk about the Macro decision making and how to build The big picture you’re going to need Several stops along the way to keep you On the right path and to build in the
Second part of our holy trinity Progressive overload [Music] You

