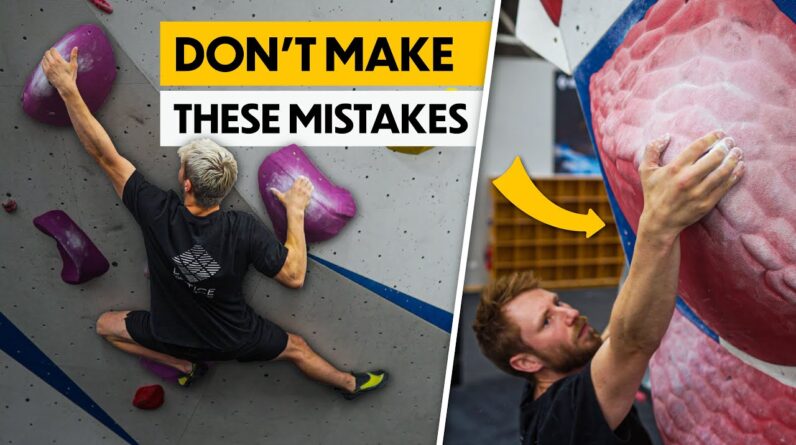
We think slopers can be the most unforgiving holds but do we need wizard level technique to master them? It turns out more than 95% of the errors made on slopers come down to just 3 common mistakes. Coach Aiden reveals his secrets with what these mistakes are and how we can work through them. We cover the details of body position, friction and grip position. With these 3 skills, one becomes the master of slopers.
Do you find yourself struggling to hold Slopers well it might be that you are Making one of these three mistakes today We’ve got aiden our resident slope Expert to talk us through the biggest Mistakes we see when holding slopers [Music] The number one biggest mistake we see When people are trying to hold slopers Is putting their body position in the Wrong place and losing core tension so What aiden means here generally with Slopers is staying low on them and Staying close into the wall so they’re Probably the most unforgiving hold when It comes to body position because Pulling hard on them doesn’t necessarily Make them any better so i’ve got a Pretty big round slope here now Generally this is actually quite good Loads of surface area but i’m going to Show you how the direction of pull and Where our weight is on the wall is going To make a massive difference to how well It holds onto the hole so if i wrap it Around here put it on a sloper and i Keep this resistance band into the wall Doesn’t matter how hard i pull it’s Going to stay on but if this comes out From the wall it slides off just the Smallest amount and again if we look at The orientation of the sloper it’s Pointing in this direction this is where We think our force should be applied
If i put it on here again And i Bring my weight over this way it’s more Likely to slide off again so a good Example of this is on this client Although we wanted to get to this hole We’re going to be using this hole to Keep our center of gravity In the opposing direction to the next Hole and use this to pull our hips down And into the wall and then once we’ve Hit this next hole we’re going to put Our heel up on here and use this to pull Our hips even further across so that we Can move up to this next hold so as Aidan said he’s going to be putting a Heel hook on this hold to be able to Make the move up and keep low on this Hold so that’s body positioning which is Our first point we want to keep our body Into the wall as well like we showed you With that that theraband being pulled Into the wall and this brings us to our Second point which is about maintaining Core tension which is going to keep a Slow on the hold so we can have slight Bend arms that’s fine but we need to Keep our hips and our legs working to Keep us into the wall and that’s core Tension our second point you may have Heard people say when doing a big move To an edge or a crimp that you should Aim past the hold and this can be a good Tactic for making sure that you make the
Distance when doing big moves however With slopers aiden is telling us that we Need to make sure that we don’t go too High on them because if we catch them in A high position it means our hips and Our arms might be too bent to actually Get good perch on the slipper so make Sure we’re even more accurate when it Comes to hitting slopes so this yellow Is a perfect example of what josh was Just talking about where you want to hit The hold pretty low with your hips still Sucked into the wall and if you Overshoot it with a bent arm it can be Way harder to hold and move around the Second really big mistake with slopers Is not getting the most out of the Friction i mean look at this thing it is Filthy it is covered in chalk so the First tip when it comes to friction is Brushing your hold and getting all this Chalk off so that you release some of That chalk and get the friction back on The holds [Music] A lot of people think the t-shirt slap Is a bit of a showboating but it’s Actually really useful to get the excess Chalk off it and get that friction back Now that we’ve got the holds ready by Doing our brushing it’s important to Make sure that your hands have a decent Amount of chalk on for the friction so Here i’ve got a boulder bucket with
Loose chalk in and that’s really Excellent for getting full coverage Particularly on the palms and then to go Even more sort of detailed into the Chalk we’re going to go with liquid Chalk this is really good for getting Full coverage and particularly sort of Like drying out the skin cooling it down As well if it’s got any alcohol content It’s pretty harsh stuff so i might only Use it a few times in a session with my Skin maybe other people have skin that’s A bit easier to do it more frequently But just go careful and see how this Works for you Just make sure that your hands are Properly chalked if you’re going to be Using soapers because they are the worst Forgiving when it comes to the friction You need on them comparing them stuff Like crimps or ink edges mistake number Three is not experimenting or being Creative with how you can hold slopes so There’s actually a few different ways There’s our big open-handed as much Friction as we can get onto the sloper And then the other side of that might Literally be full crimping sort of Ripples in a sloper we’ll typically see People trying to crimp slopers when They’ve got poor open hand strength so I’d suggest these people try to use open Hand more and see if they can become More comfortable with that but right
Behind me we’ve got an example of a Sloper where we’re actually going to be Holding more of a half print position so That we apply more tension or more Pressure through just the tips of our Fingers when we can find little Depressions or ripples within a sloper So in this example of a sloper you’ll See these little divots and actually if We just go for the typical open hand Slap it can be quite hard to hold Particularly because as those ripples Bump in we’re going to lose any surface Area of friction on our hand in those Ripples so here i might be trying to Line up on a particular area and like i Said trying to get more of a crimp grip And trying to line up in one of these Divots and trying to find the best place For it and applying most of the pressure Just through my fingertips this is Another example here where we don’t Actually have any obvious features here But we when we feel it we can subtly Pick out this kind of lip or this ripple Along the sloper where i want to be Getting all four fingertips kind of Lined up on this so rather than holding It open like this or like here where i Might only get two fingertips on i’m Gonna bring all fingertips in line and Then like aidan mentioned earlier of the Pinching i’m gonna get that pinch and That’s gonna be the best grip position
For me on this sloper so although hip Positioning is really important it can Only go so far and sometimes it’s really Important to get the thumb involved in Slopers so you can put more weight Through the hold and also it will help With pushing downwards to help you go Upwards to the next hold this orange is A perfect example where using thumbs Makes these slopes so much better pretty Much every one of these slopers requires You to use your thumbs no matter where You put your hips [Music] If you enjoyed this video don’t forget Me and aiden did a video on our top five Training tips for indoor climbing so Check that out over here otherwise we’ll See you next time [Music]